Niantic is continuing to announce new events and content for Pokémon GO. Read on below to learn more:
Routes Requirements and Best Practices
There are a few best practices to follow in order to create a high-quality Route:
- Route Length: While a Route can be anywhere between 0.5 km and 20 km, we recommend a distance of no more than 2km to make your route accessible for as many Trainers as possible.
- Route Start & End Points:
- Select PokéStops or Gyms that are in places you like to play Pokémon GO with others, like a local park, to serve as your Route’s start and end points.
- Please note that PokéStops or Gyms associated with special events (like Pokémon GO Fest) or Sponsored PokéStops can not be selected as Start or end Points.
- If you have created a long Route, consider having your end point somewhere Trainers can rest for a moment once they’ve completed the Route.
- Select PokéStops or Gyms that are in places you like to play Pokémon GO with others, like a local park, to serve as your Route’s start and end points.
- Route Path:
- Your Route should be one, continuous path with a clearly defined start and end point. It can’t start in one place, pause and then resume in another with a jump in between.
- Routes cannot be used to display inappropriate or abusive imagery on the Map or to draw attention to or abuse individual Trainers.
- How the Route Feels:
- A great Route takes fellow Trainers somewhere that may feature a great view, a garden, interesting artwork, or be a quiet part of town that people may not know about.
- Routes should be safe and publicly accessible by pedestrians.
- The Route should feel “evergreen” and not focus on something temporary, like a concert or special event.
- Route Title & Description:
- The title should describe the intention behind the Route, such as “A Quiet Walk Through my City,” “Learn More About our Town’s History,” or “Tour of my Favorite Parks.”
- The description can be more personal about what makes the Route special to you such as “If you walk here in the morning, you can see many cute dogs.”
- Try to use the tags to help people fully understand what they’re getting into based on their personal desires and capabilities
- E.g. If your Route passes by several Gyms, other Trainers might want to know that it is Raid-friendly.
- Make sure that you exclude any personally identifiable information from your Route title and description.
Source: Official Pokémon GO support page
How Do I Create a Route?
There are two options to start creating a Route, you can either tap Create New Route from the Route section of the Nearby menu, or scroll to the Routes section of your Trainer Profile and tap on the Create New Route button.
Select start and end points
After tapping Create New Route, you will be shown a map of nearby locations. Select a nearby PokéStop or Gym to be your Route start point by tapping the location on the map and tapping Set as Start Point.


Make sure to choose your start point carefully. Once you have started recording your Route path, you will not be able to change it. If you want to change your start point but have already started recording your Route path, you will have to quit and restart the Route creation process from the beginning.
Once you have chosen a location to serve as your start point, you will also need to select a location that will be the Route end point. You can change your end point at any point while recording your route path or opt to select the end point later by tapping Select Later.
Note that you can select the same location as both start and end point to create a Loop Route.
Review your selected start and end points for your Route. To change a start or end point selection, tap the Change button next to the point. Tap Confirm and Proceed when you are happy with your point selections. The next step is to navigate to your start point to begin mapping your Route path.
Recording the Route path
After you have selected the Route start and end points, you must explore along the map to mark the path you want other Trainers to follow.
Locate your start point on the Map view by looking for the blue flag marker above the PokéStop or Gym you selected. Once you are close enough to your start point, you will receive a notification to begin path recording. Tap the Yes button to begin.
As you move in the real world, your Route path will be marked on the Map View by a line. You can see the path you’ve walked by pinching to zoom out on the map or by tapping the Route Edit button above the Binoculars menu. Note that the minimum length of a Route is 0.1km, you can track the total length of your Route by tapping on the Route Edit button.
You can pause or quit Route creation at any time by tapping the Route Edit button and selecting Pause Route Recording or Quit Route Creation. Once you pause Route creation, you will see a pause icon appear on the map to identify your pause location. You must be within 10m of your pause location in order to resume Route creation. This menu will also allow you to set or change your Route end point. To resume the creation for your Route, tap on the Route Edit button and then tap Resume Route Recording.
If you paused Route creation, you can also resume it by tapping on the Resume Route Creation button on the Creator tab. This will allow you to resume exploring the Route path or adding Route details before submitting.
Ending and Submitting your Route
Once you are satisfied with the path you have recorded for other Trainers to follow along your Route, you can end the route by arriving at the pre-selected end point for your Route. You can also change the end point at any time during your Route path recording by tapping the Route Edit button and tapping Choose New End Point.
Once you are close enough to your end point, a pop-up will appear allowing you to continue recording your path by tapping Continue Recording or complete your path recording by tapping Yes, I’m Done. Continue with the Route creation process by tapping Write Now to add additional information about your Route or tap Write Later to pause Route creation. Resume the process at any time by tapping the Resume Route Creation button on your Trainer Profile.
When you are ready, add a Route title and description to your Route. This information should be descriptive enough for other Trainers to know a little bit about the path you have created. You can also add up to 5 optional Route tags to help other Trainers know a little bit more about what to expect on your Route, such as Art, Nature, etc. Tap Next once you are satisfied with the details.
The last step is to design a Route Badge that other Trainers will receive when they complete your Route. Choose from one of the Wayspot Photo Contributions from either your start or end point as the Icon and set a color for your Badge header.
Tap Next to review your Route name, description, tags, and Badge, and tap Submit to send your Route for moderation.
Route Review Process
Once you have submitted your Route, it will go through moderation before it will appear for other Trainers to follow.
You can check on the status of your Route at any time from your Trainer Profile. Scroll to the Routes section and tap on the Creator tab to see a list of Routes that have been published, are pending moderation or that have been rejected. You will only be able to see this tab once you have submitted your first Route.
If your Route has been rejected, you can tap on it from the Creator list to see a notification with the reason the Route was rejected. Note that multiple submissions of Routes that are in violation of our policies and best practices may result in being banned or suspended from Pokémon GO.
Source: Official Pokémon GO support page
Routes FAQ
Why is Routes not available to me?
In order to be able to follow a Route, you must first reach Level 5. Additionally, if you login with a child account (via Niantic Kids or Pokémon Trainer Club), check the Friends and related features settings in the Parent Portal.
How can I find nearby Routes?
Approved Routes will appear in the Route tab of the Nearby menu. Sometimes Routes may not appear in the Nearby menu if you aren’t close enough for them to appear. Try walking around your local area to see if new Routes become available.
Why are there no Routes near me?
We appreciate your excitement to participate in Routes! Our team is continuing to work hard to get more Route submissions approved for a quality experience, however please know that Routes are reviewed in the order that they’re submitted, so it may take some time for more Routes to be available near you.
Why can’t I create a Route?
While everyone is able to explore Routes, the ability to create new Routes is only available to select Pokémon GO players at this time. Please stay tuned – we will expand access soon.
Source: Official Pokémon GO support page
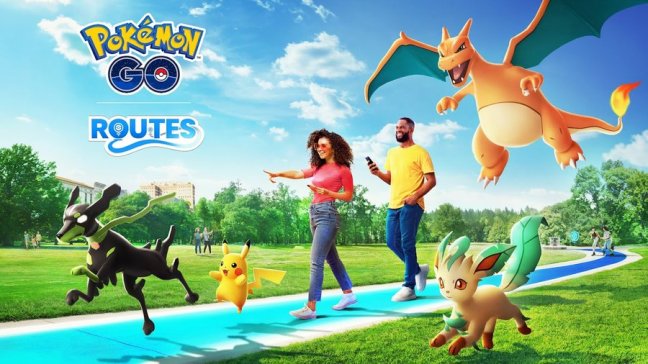
Zygarde and Routes Debut in Pokémon GO during the Blaze New Trails Event
Set out to see new sights with the Order Pokémon at your side.
Whether you prefer taking the road less traveled or would rather wander a bustling boulevard, Pokémon GO’s new Routes feature proves that the journey is just as important as the destination. Get started with Routes during the Blaze New Trails event, which takes place from July 21, 2023, at 10:00 a.m. to July 24, 2023, at 8:00 p.m. local time.
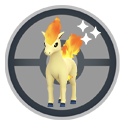
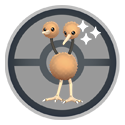
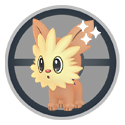
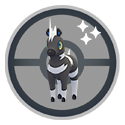
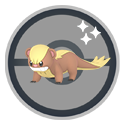
The Legendary Pokémon Zygarde will also make its Pokémon GO debut as a reward encounter for completing the newest Special Research story, From A to Zygarde. Plus, you’ll get to enjoy event bonuses such as an increased chance of encountering Shiny Yungoos and reduced distance required to earn Buddy Candy while exploring Routes with your buddy.
Throughout the event, the following Pokémon will appear more frequently in the wild.
- Growlithe
- Ponyta
- Doduo
- Lillipup
- Blitzle
- Yungoos
Pokémon hatching from 7 km Eggs include the following.
- Rockruff
- Skwovet
- Falinks
Enjoy the journey, Trainers!
Source: Pokemon.com
What are Routes?
A Route is a pre-defined path that you can follow while exploring. These paths may be made by Niantic, official partners or other Trainers, like you!
As you follow a Route, you may discover Pokémon and Items, and completing Routes will grant you rewards. Completing a Route will earn you the badge associated with that Route, featuring a custom photo from the start or end point.
Finding a Route
You can see a list of nearby Routes by tapping on the Binoculars menu and tapping on the Route tab. This will show you nearby locations that serve as Route start points. Tap the See Nearby Routes to expand the map and see a list of available Routes.
As you are browsing the Routes list, you can tap on the flag button in the bottom right corner to sort the list by other options. By default, the list will show Routes that are nearest to you.
Tap on a Route to preview it and review the details. You will be able to see how many other Trainers have followed that Route, how many times you have followed the Route, the distance and the approximate amount of time it might take to complete the Route.
Scroll down this page to see Trainer-provided details, including a description of the Route, any Route Tags that have been added to the Route, elevation changes and the original Route creator.
To return to the list of Routes, tap the exit button in the top left corner.
Exploring a Route
Once you have found a Route and you are ready to begin, tap the Follow button. Note that the Route will not begin until you have moved close enough to the Route start point. A message will appear on the Map View if you are too far away.
The Route start point will feature a blue flag above the Poké Stop on the Map View. The Route will start automatically once you are close enough to the start point. Note that if you are already close enough to the start point, the Route will begin right away.
Follow the path marked on the Map View to follow the Route. While you are following the Route, the path will change color to show your progress towards completing the Route. Some Routes are able to be followed one-way only, while others can be followed in reverse or are a loop. These options are determined by the Route creator during the creation process. Tap the Route icon above the Binoculars menu at any time to see your active Route’s details.
Pause the Route at any time by tapping the Pause Route button on this page. If you pause a Route, you will need to return to your paused location and tap this button again to resume the Route.
To quit the Route, you can scroll to the bottom of the Route details screen and tap the Quit Route button. You will exit the Route once you tap Quit Route again on the confirmation screen.
Completing a Route
Once you have followed the Route path and have reached the end point, or the start point if the Route is a loop, you will earn the Route Badge! Similar to a Gym Badge, each Route has its own individual Badge that features an image from the start or end point. Complete the same Route multiple times to level up your Route Badge. You can see all of your Route Badges on your Trainer Profile under the Routes section.
After you have reached the end point, you will see a confirmation that you have completed the Route and details of any item rewards you have received for completing the Routes. The Route title, badge and rewards will be recorded in your Journal.
The last step in completing the Route is to give the Route a star rating. Your rating will be used to assess the quality of the Route, but will not be shared publicly. If you have previously given that specific Route a rating, you will not see this screen.
Note that it’s possible to reach the end point of the Route but not complete the Route. This may occur if you didn’t follow the exact path set by the creator. To complete the Route in this case, resume the Route and continue to follow until you have traveled the full Route distance.
Reporting a Route
If you find a Route that is in violation of the Niantic Terms of Service or Player Guidelines, you can submit a report to the Niantic team directly from within Pokémon GO.
From the Route details screen, scroll to the bottom and tap on Report Route. You will be asked a series of questions to gather sufficient information to perform an investigation into the Route. Once you have submitted your Report, note that you may not hear back from Niantic regarding the status of your Report or any action that is taken in response.
You can also report a Route from the rating screen by giving a Route a 1-star rating and tapping the Report Route button.
Source: Official Pokémon GO support page
Celebrate the launch of Routes with the Blaze New Trails event!

Trainers,
It’s time to chase the horizon and experience a whole new way to adventure in Pokémon GO. We’re excited to announce a new feature rolling out today—Routes! To celebrate the launch of Routes, we’re hosting a brand-new event: Blaze New Trails!
Additionally, the Legendary Pokémon Zygarde, the Order Pokémon, will make its Pokémon GO debut in the Special Research story From A to Zygarde! It seems Zygarde might have some connection to Routes…
To learn more about Routes, Zygarde, and Zygarde’s different forms, head on over to our Routes page!
Blaze New Trails
Friday, July 21, 2023, at 10:00 a.m. to Monday, July 24, 2023, at 8:00 p.m. local time
Routes
Explore the globe with the Pokémon GO community as your guide! Chart a course to show off your favorite sights or follow in the footsteps of local Trainers to see what their communities have to share. Routes are here, and with them come a whole new level of adventure in Pokémon GO!
Head over to the Routes page to learn more!
Pokémon debut
Zygarde, the Order Pokémon, will make its Pokémon GO debut!

 Wild encounters
The following Pokémon will appear more frequently in the wild. You’ll also have an increased chance to encounter Shiny Yungoos!


 Eggs
Eggs
The following Pokémon will hatch from 7 km Eggs.

Event bonuses

 Field Research task encounters
The following Pokémon will be available to encounter when you complete Field Research tasks.
Special Research
Encounter Zygarde in the Special Research story From A to Zygarde!
To learn more about this Special Research story or Routes, head over to our Routes page!
Please be aware of your surroundings and follow guidelines from local health authorities when playing Pokémon GO. Upcoming events are subject to change. Be sure to follow us on social media, opt in to receiving push notifications, and subscribe to our emails to stay updated.
—The Pokémon GO team
Chart New Paths in Pokémon GO with ROUTES
Explore the globe with the Pokémon GO community as your guide! Chart a course to show off your favorite sights or follow in the footsteps of local Trainers to see what their communities have to share.
Source: Official Pokémon GO blog
